
22July 2026
How Much Does Drywall Repair Cost? (A Handyman’s Real-World Guide)
If you are staring at a hole, crack, or stain on your wall, your first question is probably simple: how much is this going to cost to fix?
If you search online, most generic cost guides will tell you something vague like $60 to $90 per square foot. But when you call a local handyman or contractor, you might get quotes ranging from $150 for a minor dent to well over $1,000 for what seems like a simple ceiling stain.
The reason for this huge price gap comes down to one key reality: drywall repair is not a square-footage trade. It is a diagnostic and finishing trade. As a handyman, I can tell you that homeowners are rarely paying for a $15 sheet of drywall or a tub of joint compound. You are paying for time, access, specialized equipment, drying phases between coats, texture matching, and the expertise to know what not to cover up.
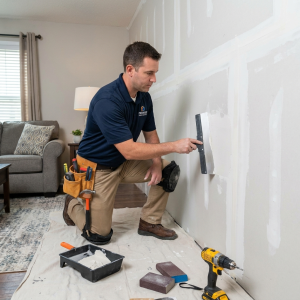
Real-World Drywall Repair Costs in the GTA
In areas around the Greater Toronto Area, including Mississauga, Milton, and Oakville, residential drywall repairs are rarely charged purely by square footage. Most handymen and contractors price jobs on a flat-rate basis because homeowners want predictable pricing rather than watching a clock.
Here is what you can realistically expect to pay for different types of drywall repairs based on the scope of work:
-
Small holes and dents like door handle punches, nail holes, or small impacts typically cost between $150 and $300. This price covers the contractor’s minimum service charge, travel, setup, basic patching, sanding, and dust protection.
-
Medium holes ranging from 5 to 12 inches usually cost between $250 and $500. This requires cutting back to solid drywall, adding backing support, and applying multiple coats of compound.
-
Larger drywall patches between 1 and 3 square feet generally cost between $400 and $800 due to the extra labor required to feather and blend a wide surface area.
-
Water-damaged drywall repairs typically range from $500 to $1,500 or more. This price accounts for finding the source of the issue, removing compromised materials, allowing framing to dry, replacing insulation, and rebuilding the surface.
-
Ceiling repairs usually range from $400 to $1,500 or more. Working overhead requires extra labor, staging or ladders, heavy dust containment, and careful blending under overhead lighting.
-
Texture matching or repairs in older homes can cost between $600 and $2,000 or more, depending on the complexity of replicating existing hand-applied finishes, knockdown textures, or repainting entire wall sections.
While flat-rate pricing works best for standard repairs, hourly pricing plus materials makes more sense when the scope is uncertain, such as investigating active water leaks or tearing into walls where hidden damage may exist.
The Hidden Price Drivers That Online Calculators Miss
Many homeowners wonder why a 6-inch hole can cost $250 or more when the patch itself costs very little at a hardware store. Standard online calculators leave out the actual logistics of trade work.
Minimum service charges exist because even the smallest repair requires travel, setup, floor protection, tool prep, cutting, mudding, and cleanup.
Drying time between coats is another major factor. Professional drywall finishing requires multiple thin coats of joint compound, with each coat needing to dry completely before the next is applied and feathered. A job that takes two hours of actual labor often spans two or three days on the calendar.
Texture matching is often harder than the structural repair itself. Getting a patch flat is one thing, but replicating an existing orange peel, knockdown, popcorn, or hand-troweled finish so it disappears requires years of practice.
Ceiling repairs always cost more than wall repairs. Working overhead is physically demanding, requires staging or ladders, creates falling dust that demands careful containment, and reveals every minor flaw under overhead light.
Access and site protection add non-repair labor time. Moving heavy furniture, working in cramped basements around ductwork, or navigating elevator rules and parking restrictions in condo buildings all take time.
Hidden damage behind the drywall frequently changes the scope of work. The visible hole or mark is often just a symptom of a larger issue like a plumbing leak, rotted framing, or compromised insulation that must be fixed first.
Paint matching is frequently overlooked. Paint fades over time, and patching a small section often means priming and repainting an entire wall corner-to-corner so the finished repair does not look like a shiny blotch.
The Investigation-First Principle
One of the most memorable repairs I ever handled was a ceiling repair where the homeowner thought they just had a small water stain about the size of a dinner plate.
When I opened up the damaged area, I discovered that the drywall had been slowly absorbing moisture from a hidden plumbing leak for weeks. Behind that small visible stain was a much larger problem involving weakened drywall, soaked insulation, and damp framing that needed to dry thoroughly before any rebuilding could happen.
That job highlights the biggest lesson generic home improvement guides miss: the visible hole is rarely the actual repair area. Many DIY guides tell you to cut out the bad piece, add a patch, apply compound, sand, and paint. That works fine for purely cosmetic damage, but professional repair work starts with understanding why the drywall failed in the first place.
Before making a single cut, I treat every repair like an investigation by asking a few core questions:
-
What actually caused the damage, such as water, impact, building settlement, or poor initial installation?
-
How far does the damage extend behind the visible surface?
-
Is the surrounding drywall strong enough to support a new patch?
-
How will the repair blend with the existing wall texture and paint?
Rushing to close up a hole because a homeowner wants it gone quickly is a mistake. Trapping moisture behind new drywall leads to mold growth, bubbling paint, and paying for another repair a few months later. A good repair solves the root cause of the problem, not just the mark you can see.
Know When to DIY and When to Call a Handyman
Not every drywall repair requires a professional. Filling small nail holes, repairing tiny dents, or patching a minor handle punch in a garage are great weekend DIY projects.
The line between a DIY project and a professional job comes down to simple filling and sanding versus diagnosing, rebuilding, blending, and texture matching.
Homeowners attempting DIY repairs often make a few common mistakes:
-
Making the patch too small by cutting out only the visible damage while leaving cracked or weakened drywall edges around the perimeter.
-
Using too much joint compound and creating a humped volcano effect on the wall that takes hours of painful sanding to flatten out.
-
Failing to install solid backing support behind larger patches, causing the repair to flex and crack around the edges when touched.
-
Ignoring moisture and slapping a patch over damp materials, which traps water and creates mold issues later.
You should stop and call a professional handyman when the damage involves water or plumbing leaks, when the hole is larger than four to six inches, when the repair is on a ceiling or high-visibility living space wall, when a crack keeps coming back after being patched, or when you need to match a textured surface.
How to Compare Quotes and Avoid Paying Twice
If you are holding two or three different drywall repair quotes right now, my single best piece of advice is simple: do not automatically pick the lowest price. Choose the contractor who gives you the clearest explanation of what they are fixing and why.
Drywall quotes often vary because contractors are quoting entirely different scopes of work. One person may be pricing a quick, cosmetic cover-up, while another is pricing a proper repair that includes preparation, structural backing, multiple coats, texture matching, and cleanup.
Ask every contractor these three questions before hiring them:
-
What specific steps and materials are included in your price, including the number of coats, texture matching, priming, painting, and cleanup?
-
What do you think caused this damage in the first place?
-
How do you plan to match the surrounding wall texture and paint finish?
Watch out for major red flags during the process. Unusually low quotes often mean the contractor plans to skip backing support, apply one thick coat of mud, leave texture unblended, or skip cleanup. Contractors who claim a complex job is just a quick thirty-minute patch are usually rushing a process that requires proper drying time. Finally, avoid contractors who quote a job without asking any questions about water exposure, wall history, or how the damage occurred.
The cheapest drywall repair is always the one that is done correctly the first time. Focus less on the material square footage and more on finding a professional who diagnoses the problem, explains their process, and delivers a finish that leaves your wall looking like damage never happened.
One Reply to “How Much Does Drywall Repair Cost?”