
6August 2026
Streaky or discolored grout is one of the most common bathroom problems I see in downtown Toronto condos, townhouses, and older homes. In many cases, homeowners assume the grout is permanently damaged or that they need an expensive bathroom renovation.
That is not always the case.
Grout discoloration can be caused by surface dirt, soap scum, mold, mildew, mineral deposits, grout haze, inconsistent mixing, failing caulking, poor ventilation, or moisture getting behind the tile. The right solution depends on identifying the cause before attempting a repair.
In my experience, grout problems are often symptoms rather than the actual problem. If the underlying moisture or ventilation issue is not corrected, even newly cleaned or replaced grout can become streaky and discolored again.
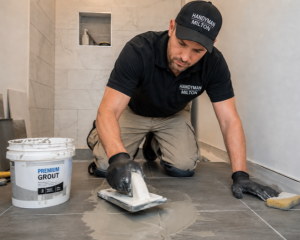
Common Causes of Streaky or Discolored Grout
Mold, mildew, and moisture buildup
Dark grout lines are often caused by mold, mildew, soap residue, and years of moisture buildup. This is especially common in bathrooms that receive heavy daily use but do not have adequate ventilation.
Darkening is usually most noticeable:
-
In shower corners.
-
Around the drain and shower floor.
-
Along the bottom rows of wall tile.
-
Around fixtures and areas where water sits.
-
Along joints with cracked or failing silicone.
Cleaning may improve the appearance temporarily, but recurring dark grout usually means moisture is not being controlled properly.
Grout haze after installation
White or dusty-looking patches may be grout haze. This happens when excess grout is not properly removed from the tile surface after installation or a DIY repair.
Grout haze can leave a cloudy film or white patches across the tile and grout. It is different from ordinary soap scum and may require a grout-haze remover or professional-grade product designed for the type of tile and grout involved.
Inconsistent grout colour
Uneven grout colour can occur when the grout was mixed inconsistently, too much water was added, or the surface was cleaned too aggressively while the grout was curing.
Patch repairs can also create noticeable colour differences. Even if the new grout is the same general colour, it may not match older grout that has faded, absorbed stains, or been exposed to different cleaning products.
This type of uneven colour is not always a surface stain. Sometimes the variation is built into the grout itself.
Hard water and chemical staining
Yellow or brown grout stains can be caused by hard-water deposits, soap residue, cleaning chemicals, or old grout sealer breaking down.
Using stronger chemicals does not necessarily solve the problem. In some cases, repeated use of aggressive products can damage cement-based grout, nearby finishes, natural stone, or protective sealers.
Failing caulking
Many homeowners focus on the grout but overlook the silicone joints around the tub, shower corners, fixtures, and changes of plane.
Cracked, shrinking, peeling, or separated silicone can allow water to reach areas where it should not be. That moisture can cause grout to darken repeatedly, even after the grout has been thoroughly cleaned.
New silicone should not be applied over old silicone. The failed caulk needs to be removed completely, the area cleaned and dried, and the new silicone applied to a properly prepared surface.
Poor bathroom ventilation
Limited airflow is a major cause of recurring grout and caulking problems, particularly in Toronto condos with small bathrooms or weak exhaust fans.
If the bathroom remains damp long after a shower, moisture can stay trapped in grout joints, corners, caulking, drywall, and other materials. Over time, this creates the conditions for mildew, staining, and deterioration.
A Toronto Condo Grout Case Study
One job that stands out was in a condo bathroom near Toronto’s Entertainment District. The homeowner believed the shower grout was permanently ruined because the floor grout had become almost black while the wall grout looked blotchy and had white patches.
They had already tried bleach, vinegar, and several store-bought grout cleaners without getting lasting results.
When I inspected the shower, I found three separate problems:
-
The dark floor grout was covered with years of mildew and soap residue.
-
The white patches were grout haze from an earlier DIY repair.
-
Several corners had cracked silicone that was allowing moisture to sit behind the tile.
The grout itself was not the only problem, and a full regrouting job was not the first repair I recommended.
I professionally cleaned the grout, removed the haze using the appropriate grout cleaner, replaced the failing silicone, repaired several damaged grout joints, and sealed the grout after everything had dried completely.
The transformation was dramatic. The homeowner thought a complete bathroom renovation was necessary, but the shower looked almost new again for a fraction of the cost.
That job is a good example of why I do not recommend replacing grout before diagnosing the cause. If the failed caulking and excess moisture had been ignored, the same staining would likely have returned.
How I Diagnose Grout Discoloration
When I inspect streaky or discolored grout, I do not assume the grout itself is the problem. I use a step-by-step process to determine whether the issue is cosmetic, structural, or moisture-related.
I ask about the history
I start by asking the homeowner:
-
When did the discoloration first appear?
-
Did it develop gradually or appear suddenly?
-
What cleaning products have been used?
-
Has the grout ever been sealed or repaired?
-
Does the same area become dark again after cleaning?
This information often helps identify the likely cause before I begin testing.
I study the pattern
The location and pattern of the discoloration can provide important clues.
A light, dusty film across many grout joints may indicate grout haze. Dark areas concentrated in corners, on the shower floor, or where water collects may point to mildew or trapped moisture.
Random blotches may indicate inconsistent grout mixing, previous spot repairs, or uneven cleaning during installation.
I test a small area
I clean a small test section with an appropriate professional cleaner. If the original colour returns, the problem may be surface dirt, soap scum, or mineral deposits.
If the discoloration does not change, the stain may have penetrated the grout. It may also indicate that moisture is coming from behind or below the tiled surface.
I inspect the silicone
I carefully check the silicone around:
-
Shower corners.
-
Tub and shower edges.
-
Fixtures.
-
Changes of plane.
-
Areas where tile meets another material.
Cracked, shrinking, or separated silicone is one of the most common causes of recurring moisture problems.
I look for moisture warning signs
I check for loose tiles, hollow sounds when tiles are tapped, swollen baseboards, peeling paint outside the shower, soft drywall, and musty odours.
These signs may indicate that water is getting behind the tile. Cosmetic cleaning will not solve hidden water damage.
I evaluate the grout and sealer
If the grout has inconsistent colour throughout a newer installation, I consider whether it was mixed with too much water or cleaned too aggressively while curing.
On older showers, I also test how quickly water absorbs into the grout. If the grout immediately darkens and absorbs water, the protective sealer may have worn away.
Sealer does not make grout waterproof, but it can help reduce the absorption of moisture, soap residue, and everyday stains.
What I Recommend for Cleaning and Repairs
Use the right cleaner
For routine maintenance, I recommend a pH-neutral tile and grout cleaner. It is generally suitable for grout, porcelain, ceramic tile, natural stone, and existing sealers when used according to the product instructions.
For heavy soap scum or mineral deposits, I use a professional-grade cleaner selected for the specific problem and surface. The strongest chemical is not automatically the best choice.
Mold and mildew should be cleaned properly, but the moisture source must also be corrected. Spraying cleaner on a recurring mold problem without improving ventilation or repairing leaking caulk is only a temporary solution.
Repair damaged grout properly
When grout is cracked, loose, or missing, I remove the damaged sections before installing new grout.
I do not recommend simply smearing fresh grout over deteriorating grout. The new material may not bond properly and can begin failing again in a short time.
If the grout is structurally sound but stained, professional cleaning followed by sealing may be enough to restore its appearance.
Use 100% silicone in wet areas
For showers, tubs, and other wet areas, I recommend high-quality 100% silicone bathroom caulk with mold-resistant properties.
Silicone remains flexible and is better suited to the movement that naturally occurs in buildings. I avoid inexpensive latex or painter’s caulk in wet areas because it can shrink, crack, and fail sooner.
Seal grout after it has cured and dried
After grout repairs have cured properly and the area is completely dry, I generally recommend a quality penetrating grout sealer.
Depending on how heavily the bathroom is used, cement-based grout may benefit from resealing every two to three years. The exact timing depends on the grout, sealer, cleaning routine, and level of use.
DIY Mistakes I Recommend Avoiding
Homeowners often create bigger problems while trying to remove a stain. Common mistakes include:
-
Using straight bleach as the solution for every type of discoloration.
-
Scrubbing with steel wool or aggressive wire brushes.
-
Using straight vinegar repeatedly on every surface.
-
Applying excessive water to grout that already has a moisture problem.
-
Pressure washing indoor tile and grout.
-
Applying new silicone over old silicone.
-
Using grout paint to cover an active moisture problem.
-
Mixing bleach with ammonia, acidic cleaners, or other household chemicals.
Bleach may lighten certain stains temporarily, but it does not correct poor ventilation, failed caulking, or water intrusion. Vinegar can also damage some natural stone surfaces and gradually affect cement-based grout with repeated use.
Always follow the product label and never mix cleaning chemicals.
A Simple Maintenance Routine
The best way to prevent streaky and discolored grout is to control moisture consistently.
After every shower
-
Use a squeegee or towel to remove water from shower walls and glass.
-
Wipe standing water from the shower floor and corners.
-
Leave the shower door or curtain open so the area can dry.
-
Run the exhaust fan during the shower and for at least 20 to 30 minutes afterward.
Clean once a week
Use a pH-neutral bathroom cleaner and a soft brush or microfiber cloth. Regular light cleaning is easier on grout and more effective than waiting until the grout becomes heavily stained.
Inspect once a month
Look for:
-
Small cracks in the grout.
-
Silicone pulling away from corners.
-
Loose tiles.
-
Areas that remain dark after the bathroom has dried.
-
New mold around corners or fixtures.
-
Peeling paint, soft drywall, or staining outside the shower.
Finding these problems early can mean a simple repair instead of a much larger moisture-damage repair later.
When to Stop Scrubbing and Call a Professional
You should consider having the bathroom inspected if:
-
Grout turns dark again only days after cleaning.
-
Mold keeps returning in the same locations.
-
Grout is cracking, crumbling, or falling out.
-
Silicone is peeling, splitting, or separating from the tile.
-
Tiles feel loose or sound hollow when tapped.
-
A musty smell will not go away.
-
Paint or drywall outside the shower starts bubbling or staining.
-
Water appears outside the shower after it has been used.
-
The bathroom remains damp for a long time after showering.
These signs can indicate that moisture is getting somewhere it should not. Stronger cleaning products will not solve that type of problem.
Grout Services in Downtown Toronto
I provide handyman services for homeowners and condo owners throughout Downtown Toronto and nearby neighbourhoods, including The Annex, Yorkville, Liberty Village, CityPlace, King West, Queen West, The Distillery District, Harbourfront, St. Lawrence Market, Cabbagetown, Leslieville, Riverside, The Junction, Roncesvalles, and High Park.
Depending on the condition of the bathroom, the work may include:
-
Grout cleaning and sealing.
-
Grout repair and replacement.
-
Bathroom recaulking.
-
Tile repairs.
-
Shower and bathtub maintenance.
-
Drywall repair related to moisture damage.
-
Minor water-damage restoration.
-
Bathroom fixture repairs.
-
General bathroom handyman services.
My approach is to recommend the least invasive solution that properly addresses the cause. Sometimes that means professional cleaning and resealing. Other times, it means replacing failed silicone, repairing damaged grout, improving ventilation, or investigating possible water intrusion.
Final Advice for Toronto Homeowners
Discolored grout is not always a cosmetic problem. It can be an early warning sign of excess moisture, failing caulking, poor ventilation, or hidden water damage.
Before reaching for stronger cleaners or assuming you need a complete bathroom renovation, inspect the grout, silicone, tiles, and ventilation. If everything appears structurally sound, begin with proper cleaning, better airflow, and regular maintenance.
If the grout keeps darkening, mold returns, the caulking fails, or you notice loose tiles, soft drywall, or water outside the shower, stop scrubbing and have the bathroom assessed.
The sooner the underlying problem is identified, the easier and less expensive it usually is to repair. Don’t ignore grout that is trying to tell you something.