
4August 2026
If you’re asking, “Can you caulk over old caulk?” the short answer is yes, sometimes, but in most cases, you shouldn’t. From my experience working in Toronto Downtown condos, townhomes, and older houses, caulking over old caulk usually hides the real problem instead of fixing it.
A lot of homeowners think caulk is just a cosmetic finishing touch. In reality, especially in bathrooms, showers, tubs, and kitchen sinks, caulk is part of your home’s waterproof protection. If the old bead is failing, the new one usually won’t last unless the surface is properly prepared first.
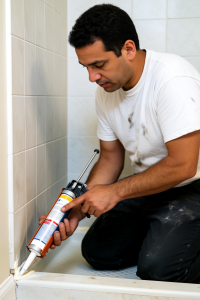
Why Old Caulk Fails in Toronto Homes
The biggest reason old caulk fails is not always age. In my experience, the number one issue is poor surface preparation before the original caulking was applied. I’ve removed plenty of failed caulk in Toronto condos that had been installed over old silicone, soap scum, moisture, or mildew. New caulk cannot bond properly to a dirty or damp surface, so it starts peeling away much sooner than it should.
The second major issue is using the wrong type of caulk. I often see painters’ acrylic caulk used in bathrooms because it is cheaper and easier to apply. That might be fine for dry trim work, but it is the wrong choice for showers, tubs, and other wet areas. For those areas, I always recommend a high-quality, 100% mildew-resistant silicone caulk.
Building movement is another common cause of caulk failure, especially in Toronto Downtown condos and older homes. Seasonal expansion and contraction can cause rigid or thinly applied caulk to crack or separate. Once that happens, water can get behind tiles, tubs, or fixtures and create bigger repair problems.
When You Should Not Caulk Over Old Caulk
In my opinion, caulking over old caulk is almost never the best solution. It may look like a quick fix, but it often leads to more peeling, more moisture buildup, and more frustration later.
The only time I would consider going over existing caulk is when the original bead is still firmly bonded, completely clean, free of mold, and only has a small cosmetic gap or pinhole. Even then, I would treat it as a temporary touch-up, not a proper long-term repair.
In most Toronto bathroom caulking jobs, I recommend removing the old caulk first if:
-
The caulk is peeling, cracked, or separating from the surface.
-
There is any sign of mold, mildew, or discoloration.
-
The bead feels soft, brittle, or loose.
-
Water has been getting behind the joint.
-
Multiple layers of old caulk are already there.
-
The bathroom has had leaks or water damage.
If the old caulk is not in near-perfect condition, it is usually better to remove it completely and start fresh.
Toronto Condo Shower Repair Example
One job that stands out was in a downtown Toronto condo near the Entertainment District. The homeowner noticed water collecting along the edge of the shower and tried to solve it by applying a new layer of silicone directly over the old caulk.
At first, it looked neat. But within a few months, the new bead began peeling away.
When I removed the caulk, the problem became clear right away. There were three layers of old silicone underneath, along with soap residue, trapped moisture, and black mold. Because the new silicone had never bonded to the original layer, water continued to seep behind the joint every time the shower was used.
I stripped everything back to the original surface using professional caulk removal tools and solvent. Then I cleaned and disinfected the joint, let it dry completely, and checked the surrounding grout and tile for hidden water damage. Fortunately, the moisture had not reached the drywall, so the homeowner avoided a much more expensive repair.
Once the area was clean and dry, I installed a fresh, continuous bead of premium 100% mildew-resistant silicone and tooled it for a smooth finish and long-lasting adhesion.
The homeowner told me the shower looked better than it had in years, and the leaks stopped completely. That repair could have turned into drywall or subfloor damage, but it was fixed properly before it got worse.
The Biggest DIY Caulking Mistake
The biggest mistake I see homeowners make in Toronto is rushing the prep work.
Most people focus on the bead itself, but the real work happens before the caulk comes out of the tube. In my experience, about 80% of a successful caulking job is preparation.
A common DIY mistake is removing only the loose sections of old caulk, wiping the area with a damp cloth, and applying new silicone right away. The problem is that leftover silicone, soap scum, moisture, and mildew stop the new caulk from bonding correctly. It may look good for a short time, then start peeling, cracking, or separating.
Another mistake is choosing the cheapest product on the shelf or using the wrong caulk altogether. For Toronto bathrooms, showers, tubs, and kitchen sinks, I recommend a premium silicone designed for wet areas and built to stay flexible as the building moves.
If you want a long-lasting, professional-looking result, this is the process I recommend:
-
Remove every trace of the old caulk, not just the loose pieces.
-
Clean and disinfect the joint thoroughly.
-
Let the area dry completely before applying new silicone.
-
Use a premium 100% mildew-resistant silicone caulk made for bathrooms.
-
Apply one continuous, even bead.
-
Allow full curing time before exposing it to water.
The actual caulking is the easy part. The preparation is what separates a quick patch from a repair that lasts for years.
My Caulking Rule for Toronto Homeowners
My rule is simple: if the old caulk is cracked, peeling, discolored, soft, separating from the surface, or has any signs of mold, remove it completely first.
I’d rather spend extra time doing the prep properly than rush the job and have to come back a year later. A properly prepared and professionally installed caulk joint should last many years in most bathrooms. A rushed job with poor prep can start failing fast.
In Toronto Downtown condos, this matters even more because bathrooms often have limited ventilation and higher moisture buildup. That combination makes weak caulk joints fail faster and increases the risk of hidden water damage.
Final Advice on Caulking Over Old Caulk
My biggest advice to Toronto Downtown homeowners is not to treat caulking as a cosmetic fix when it is really part of your bathroom’s waterproof protection.
A fresh layer of caulk might make a shower or tub look cleaner temporarily, but if the old caulk underneath is failing, you may just be covering up the real problem. Before you decide to caulk over old caulk, ask yourself why the original caulk failed.
If it failed because of poor adhesion, trapped moisture, mold, movement, or water getting behind the seal, another layer will not solve the cause.
A $20 tube of caulk cannot fix a $2,000 water-damage problem. Taking shortcuts in a shower or tub area can allow small leaks to turn into major repairs involving drywall, flooring, grout, or surrounding structures.
2 Replies to “Can You Caulk Over Old Caulk?”